Are you interested in making stickers from supplies you have at home? This is the upgraded version of sloppily taping pictures you like to things around your room as a child. Follow this simple method with surprisingly effective results.

Materials

Cost
Assuming you have none of these things at home:
Instructions
1. Prepare your design. Whether this means printing out an image, creating your design by hand, or using materials at home. For this tutorial I have used pictures and letters cut from junk mail and the newspaper.

2. Take your greaseproof paper and packing tape. The first layer of tape used will be put upon the greaseproof paper, as it can be later peeled away. When placing the tape make sure that there is some uncovered greaseproof paper - a tab - to pull away from the sticker later. I suggest testing both sides of the greaseproof paper with tape to see which side does not rip and stick to the tape. It sound be noted that these stickers will be as good as your paper and tape are.

4. Take a second piece of tape and stick your design onto that piece.
5. Stick your design and front piece of tape to the back piece of tape. Make sure that the bottom piece of tape is bigger than the front piece as this will ensure the design does not peel away when you're trying to remove the sticker from the greaseproof paper.

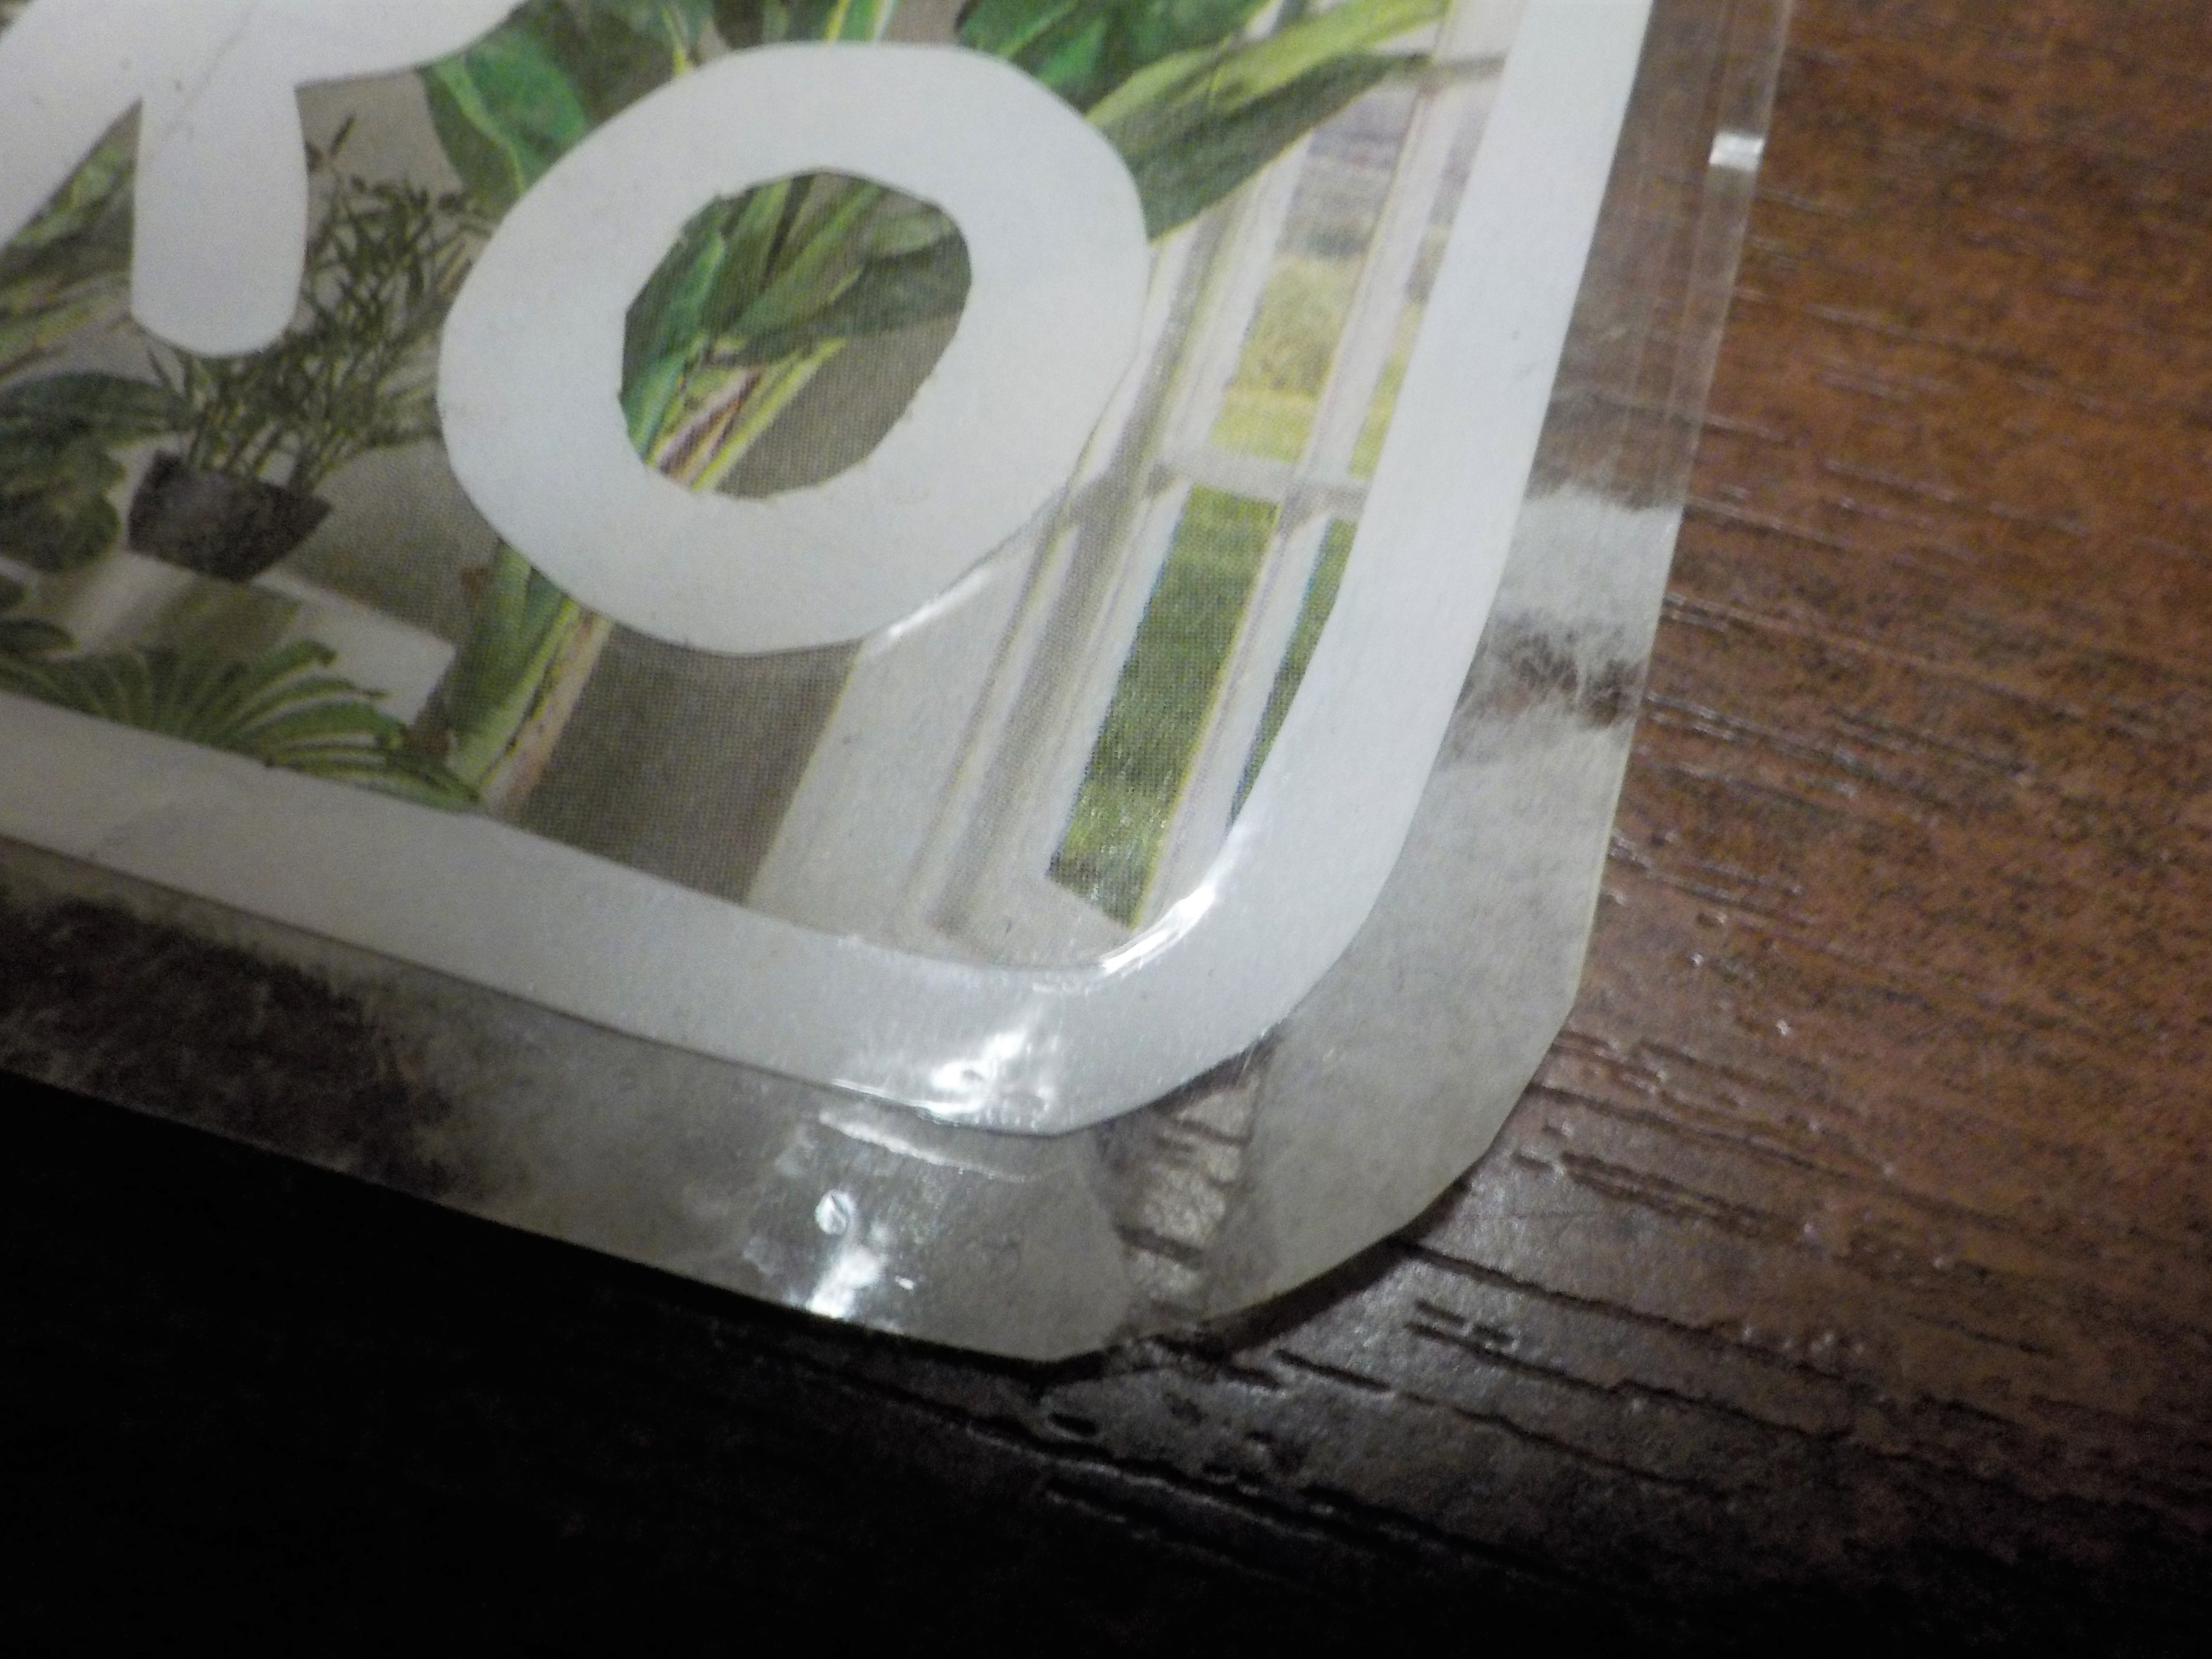
6. Cut out your design with a border of tape. It is very important that there is a border around the design as this will lengthen the lifespan of the sticker. Your sticker is now complete! The pros to having the greaseproof paper as opposed to just taping images where you want them is not only that the design has more stick, its that these don't have to be used immediately. You can take all the time you need to second guess where you will put these stickers.

7. And when you are (finally) ready, just peel off the greaseproof paper.

7. Stick those stickers!
For the best results, as in making these stickers last as long as a cheap sticker can possibly last, here are some tips:

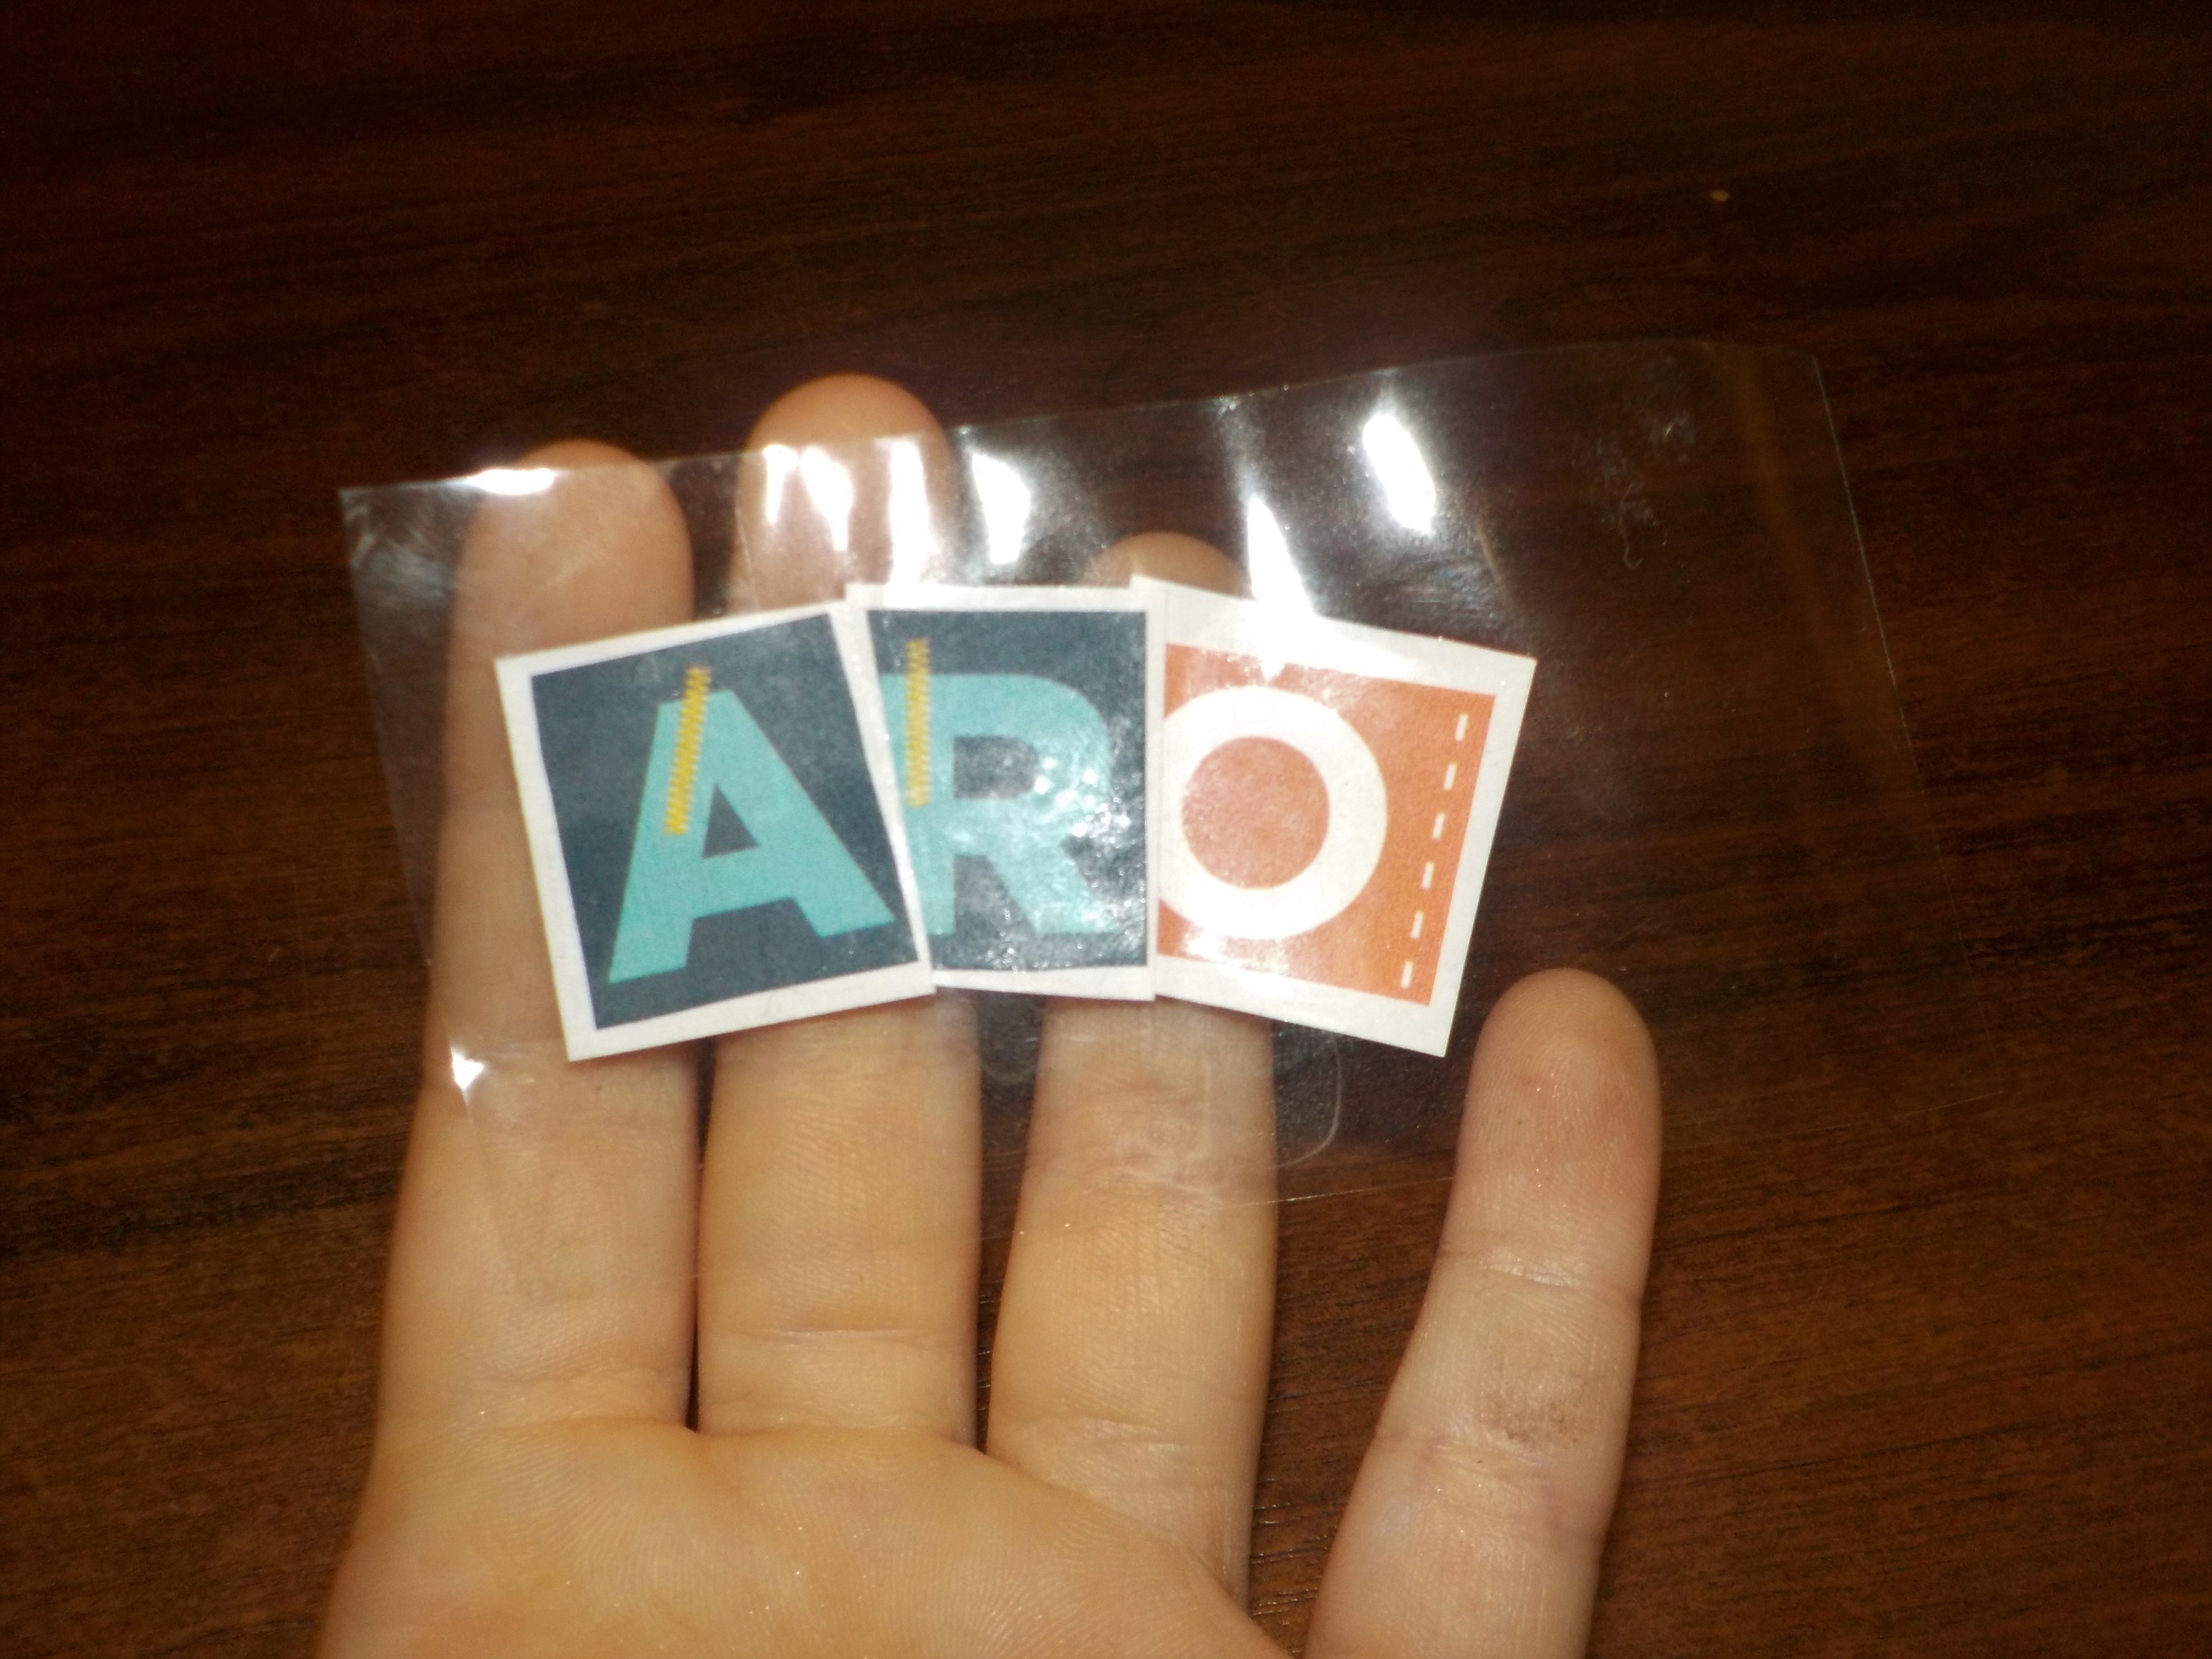
Let your imagination run wild. Below are images cut from fabric store junk mail. From left to right is the aroallo flag, a spooky aro design using the Halloween edition, and the aroflux flag.


Materials
- A design of your choice (printed image, hand drawn image, newspaper or magazine cutout)
- Packing tape
- Greaseproof/baking/parchment paper
- Scissors
- Glue (optional)
Cost
Assuming you have none of these things at home:
- Newspaper - $2AUD
- Packing tape - $3AUD
- Greaseproof paper - $2AUD
- Scissors - $4AUD
- Glue - $2AUD
Instructions
1. Prepare your design. Whether this means printing out an image, creating your design by hand, or using materials at home. For this tutorial I have used pictures and letters cut from junk mail and the newspaper.
2. Take your greaseproof paper and packing tape. The first layer of tape used will be put upon the greaseproof paper, as it can be later peeled away. When placing the tape make sure that there is some uncovered greaseproof paper - a tab - to pull away from the sticker later. I suggest testing both sides of the greaseproof paper with tape to see which side does not rip and stick to the tape. It sound be noted that these stickers will be as good as your paper and tape are.
3. Position your design how you want it. Play with it, have some fun!
4. Take a second piece of tape and stick your design onto that piece.
5. Stick your design and front piece of tape to the back piece of tape. Make sure that the bottom piece of tape is bigger than the front piece as this will ensure the design does not peel away when you're trying to remove the sticker from the greaseproof paper.
6. Cut out your design with a border of tape. It is very important that there is a border around the design as this will lengthen the lifespan of the sticker. Your sticker is now complete! The pros to having the greaseproof paper as opposed to just taping images where you want them is not only that the design has more stick, its that these don't have to be used immediately. You can take all the time you need to second guess where you will put these stickers.
7. And when you are (finally) ready, just peel off the greaseproof paper.
7. Stick those stickers!
For the best results, as in making these stickers last as long as a cheap sticker can possibly last, here are some tips:
- Stick the stickers to a sturdy, non-flexible surface
- The thinner the paper the design is on, the easier time the tape will have holding together
- And the smaller the design the less this will look like something that has been taped together!
Let your imagination run wild. Below are images cut from fabric store junk mail. From left to right is the aroallo flag, a spooky aro design using the Halloween edition, and the aroflux flag.
Tags:


